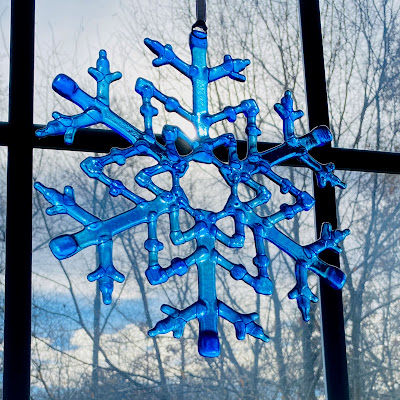
 |
| My finished glass snowflake. |
 |
| How to draw your own snowflake. |
 |
| Glass snowflake ready for firing. |
You can find the complete tutorial I published on Instructables.com at
 |
| My finished glass snowflake. |
 |
| How to draw your own snowflake. |
 |
| Glass snowflake ready for firing. |
You can find the complete tutorial I published on Instructables.com at
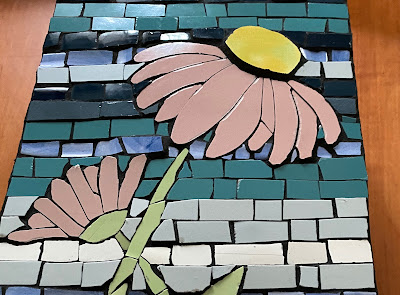 |
| My finished flower mosaic made from broken dishes. |
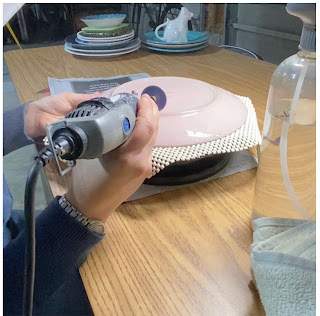 |
| Using a dremel to remove the foot. |
I had to remove the foot from each plate to flatten it and have better control of how each piece scored and broke. I did this with a dremel and a diamond wheel.
Once the foot was cut off, I could cut rectangles and squares in different shades of blue!
 |
| Cutting plates into strips. |
 |
| The rectangles cut and sorted for the background. |
I could even cut out petals and leaves!
 |
| Scoring the flower petal segments. |
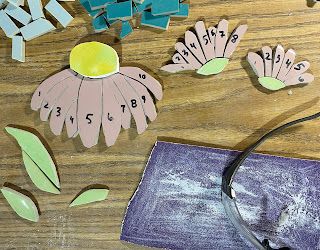 |
| The flowers completed and ready for thin-set. |
You can find a the complete tutorial I published on Instructables.com at
👀 Make a Flower Mosaic from Broken Dishes 👀
I wanted to make my own glass tesserae for a new mosaic. The tesserae are the pieces that you mosaic to your substrate or board. I have been working with Orsoni smalti in the direct method with no grout. The smalti I purchase from Italy is usually about 5/8" x 3/8" x 1/4" but does vary in size because it is handmade. Orsoni uses a large chopping machine to fracture the glass and then I place the cut side facing up in my mosaics. Here is the chopping machine my amazing husband made using my hardie and hammer so my arm wouldn't get tired!
 |
| A diy homemade smalti chopping machine |
Smalti starts as a round slab of opaque glass called a pizza. I can buy lots of solid colors, but not any streaky tessera. So my first step was to melt some scrap Bullseye glass into my own streaky glass pizzas using a pot melt techique in my kiln.
 |
| My kiln set-up to make pot melts. |
 |
| Pot melt pizzas from scrap Bullseye Glass |
The finished glass pizzas are beautiful and can be used in other fused glass projects, but these are for mosaics. To chop up my glass pizzas, I used my very own smalti chopping machine. Here is a video of it in use, I think it really works phenomenally well.
I took the time to chop up some streaky red, some green and a bit of blue. I am so happy with the results! I should note that the streaky glass did not always break square to the surface like the purchased Orsoni. This could be because I made the pizzas out of a different type of glass or maybe because the pizza is made of many different colors running at different angles to the surface. I'm not sure but I have so much glass made that I can pick and choose the pieces I use.
 |
| Home made streaky red glass smalti |
 |
| Home made streaky green glass smalti |
 |
| Home made streaky blue glass smalti |
Now to make some mosaics! Maybe a landscape with water flowing across or a field of trees in shades of green.
Sharon Warren Glass | sharonwarrenglass | sharonwarrenglass.com | FluttterByButterfly | Sharon Warren Glass Artist
 |
| A finished fused glass abstract landscape in mini. |
I love to create landscapes and cityscapes. When I begin a project, I usually start with a reference photo from a favorite place, but for my abstract landscapes I worked from memory. I hoped that maybe not beginning with a specific image would help me create a more abstract universal image of the landscape I was imagining.
 |
| My watercolor sketches for a fused glass abstract landscape. |
My first step was to paint a few small watercolors and find the best place for my horizon, adding in distant islands and the rocky shore up close. With each iteration, I came closer to the colors and layers I wanted. I tried more greens and thought about some colors opposite blue on the color wheel but decided the yellows of the spring green were too bold. Looking at the finished little watercolor sketches, I wished for the cooler tones of blue and purple.
 |
| Bullseye glass in shades of blue and purple. |
My next step was to find the glass palette I wanted to use. I opened my bins of Bullseye glass sorted by color family and found the shades of turquoise and sky blue that paired well with the lavender and plum. After I cut my base clear base glass, I added a metal ring for hanging.
 |
| The glass layers of an unfired fused glass abstract landscape. |
 |
| Firing my abstract fused glass mini landscapes. |
 |
| My finished fused glass sun, moon and stars. |
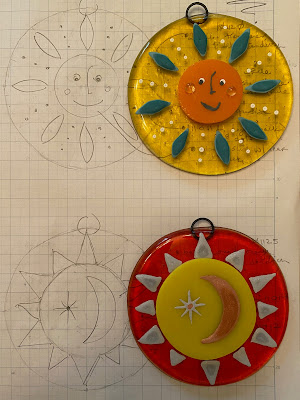
I wanted to create colorful fused glass window art of the sun, the moon and the stars that capture the light and bring a smile to your face. My suns are bright and playful, with one holding the crescent moon in its sphere. My silver moon is sweet and sleepy in a rich blue and soft lavender. These designs are inspired by the work of Alexander Girard, a mid-century modern artist.
 |
| The glass strikes to bright yellow and orange. |
Each suncatcher begins as Bullseye transparent sheet glass that gets cut and shaped into circles. The transparent yellow and oranges are made from striker glass, a glass that starts as almost colorless and changes (or strikes) to its mature color at about 1400 degF in the kiln. You can see the changes in the above photos.
 |
| Painting each sun with designs from my sketchbook. |
After the first firing, an opaque center is added and the details are painted by hand with fused glass enamels. I tried to create designs that were both happy and whimsical, like pictures you might find in a Richard Scarry storybook. All suncatchers were fired a second time to set the enamel designs and fuse the opaque middle circles.
 |
| Work by Alexander Girard |
 |
| Fused glass enamels from Colors for Earth. |
 |
| Fused glass enamel painting cat sketch. |
 |
| Painting a fused glass enamel cat. |
 |
| Painting another fused glass enamel cat. |
After mixing the powdered glass enamel with the medium to a cream-like consistency, you can paint details with a brush or a stylus. Enamels are the perfect way to add details to the cat fur and the wallpaper background. Making the dots with the stylus was fairly easy, leaving a lighter spot in the center from the metal ball. The zig zag background was more difficult because the enamel would pool at the beginning of loading up my brush, but I just decided to leave it.
 |
| My finished fused glass enamel painted cat pair. |
I fired my enamel painted cats with their dichroic glass noses in the kiln to 1350 degF to set the paints and keep the texture of the layered glass. I think their beady little eyes are so cute!
Sharon Warren Glass | sharonwarrenglass | sharonwarrenglass.com | FluttterByButterfly | Sharon Warren Glass Artist
 |
| Fused Glass Frit Painting of an Ocean |
I wanted to create a glass painting inspired by the impressionistist Henri Edmund Cross. His neo-impressionist paintings are created with a network of tiny dots of paint that come together to form pictures. Glass frit is the perfect medium to play with this idea.
A frit painting is made from crushed glass that can be purchased sorted by size - powder, fine, medium and course. Bullseye glass sells their frit in the same color palette as their sheet glass. I used all 4 types in my painting.
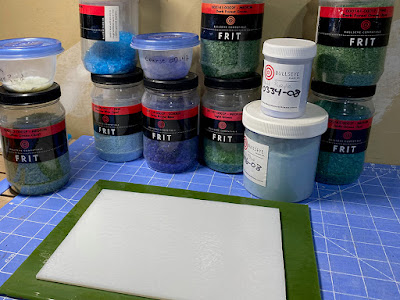 |
| Fused Glass Frit from Bullseye Glass |
To create my frit painting, I began by laying down the course chunky frit in lines for the water. I used different shades of blue, some transparent and some opaque. I tried to move from light to dark to give the picture some perspective, taking care to glue down at various stages. I continued to add frit to get the detail I wanted, working with the smaller sizes last.
 |
| Fused Glass Frit Ocean Painting Progress |
To finish the frit painting, I fired the glass in my kiln to 1500 degF for a full fuse and a smooth finish. The color of the sand was created in the heat of the kiln. This reaction happens between the sulfur and the lead in the french vanilla and sunset coral glasses. I added a sand dollar in an additional firing to give the glass painting dimension and texture. I like art that you can touch!